Created: 02/28/2022
Updated: 03/02/2022
How to Make Your Own Close-Up Mat
A close-up mat is for a close-up magician a necessity. Of course, there are venues and occasions where you do not need one or where you can't use one. But a close-up mat provides a sort of mini-stage for your magic. It marks an area that is special, a space that is under your control. This will reduce the likelihood that a spectator will simply grab an item unprompted from you and inspect it or otherwise disturb your performance. It also creates a good contrast to make your items (cards, coins, etc.) better visible. Further, it creates a known surface for you. You can practice at home with the same surface you will perform on. This ensures that moves, spacing of items, etc. are consistent reducing the chances that you make a mistake.Close-up mats come in all shapes, sizes, materials, and prices. On the low-budget end, I have seen magicians perform on pieces of carpet or even a folded newspaper. On the upper end, you can spend hundreds of dollars on mats made from exotic wood and expensive fabric, combined with carrying cases, tables, drawers, and other features.
The resourceful magician makes his own because that way you can make it exactly in the size you want it, integrate the features you need and have something unique and personal that not every other magician has, too. As a performer and entertainer uniqueness is the most important attribute. If you look and behave like the average run-of-the-mill magician then you will end up being treated like one. If you create a unique persona, a special style, then you will carve out your personal performance nitch, a good reason to be booked. The items and accessories you use are one way to set you apart from the rest. Also, keep in mind that your close-up mat needs to fit your persona. If, for example, you perform as a medieval wizard and you then pull out a sleek close-up mat with stainless steel, and carbon-fiber accents, then that would not be a good fit. (If you are not handy or just have no interest to make your own I suggest you get in touch with somebody who is. There are builders and makers in the magic community who do specialize in mats, tables, and other such accessories.)
Color is perhaps one of the most important considerations of your mat. What color are your props? What color is your outfit? For example, if you perform with red-backed cards, it is not a good idea to use a red close-up mat because the cards will not stand out as clearly as with another color. You also don't want the color of your mat to clash with your jacket or whatever garment you wear performing. Typically, close-up mats are held in darker colors such as black, navy blue, darker shades of red, green, and brown because the mat itself should visually be in the background. If it would be neon-yellow it would probably hurt to look at it for any significant amount of time. But as with any 'rule', there are exceptions. That is why making your own is such an advantage. You can experiment. You can easily make a mat with an unusual color and see how it works for you. If it doesn't you toss it and chose a different color.
The touch and feel of the fabric and the amount of 'give' or softness of the mat are all characteristics to keep in mind. Some will work better for your props and sleights than others. For example, if your mat is too soft cups in your cups and balls routine might not stand upright. If the surface is too hard it could produce sounds you don't want the spectators to hear. Testing and experimenting go a long way in finding the materials that work best for you.
Roll Up Mats
For a while, I have been using a close-up mat that could be rolled up. The mat had a neoprene foam backing and some suede-type top surface. The biggest problem with these types of mats is that they quickly look unprofessional because creases easily form, they require a flat surface, and they quickly become stained. The reason for this is that such mats need to be rolled with the performance side outwards, otherwise you will have unsightly creases develop almost immediately in the top surface. But with the performance side outwards stains and scuff marks are hard to avoid during transportation. While these mats are light and easy to pack I only use them if nothing else works.Boards
Hard boards covered with some type of fabric (see further down) are preferable. It is easier to keep them looking clean and sharp. They do not require a flat surface. You can put them on your knees if no table is available (very convenient for practicing while watching TV), or even have two spectators hold the board to create a makeshift performing platform.Mat Structure
A high-quality close-up mat consists of three layers. A board of some kind, usually wood or fiberboard that provides the structure, a layer of foam that provides the amount of give you want, and the top layer is a fabric that provides a clean good looking surface. How these layers are put together and what material they are depend on your budget and the final look and behavior you want to achieve.I use a chipboard of about 2 mm thickness as the board to bond the foam and fabric to because I have a special way to mount this to a 10 mm plywood board that I will describe further down.
For the foam, I use a material called a headliner. This is a foam with a fabric top but any foam of the thickness and consistency you want would work. I had some quantity lying around from an old project and that is why I used it. Use a spray adhesive for fabrics (for example Gorilla Spray Adhesive) to coat the board. Press the foam on it and then cut away the excess foam around the edges of the board. This by itself, board and headliner would already be a decent close-up mat. However, it doesn't look as classy, and the variety of headliners available is not as great as the variety of fabrics. That is why for a high-quality close-up mat one uses a separate fabric that goes on top of the foam.
As the top fabric, I like to use a fabric called microsuede. But there is no right or wrong. The best is to go to your local fabric store and spend half an hour exploring various fabrics and how they look and feel. Particularly if you are somebody who does not frequently work with fabrics, it is important to develop an understanding of what is available and how each fabric type feels and looks. This you can only do by actually touching the material and seeing it with your own eyes. Then experiment with two or three different varieties. You might find something that works well for you that nobody else is using.
Then again use spray adhesive to coat either the top side of the foam or the backside of the fabric and press fabric and foam together. Make sure the fabric has been ironed and has no creases. After it is glued on you will have a difficult time getting these out. Then I wrap the fabric only along the long edges around the board and glue it to the backside of the board. I deal with the short edges differently than what is typically done. Typically the short edges are also wrapped around the board and glued or stapled into place. The downside of this technique is that at the corners you will have four layers of fabric gathering. One has to be careful with this to make the top side look good.
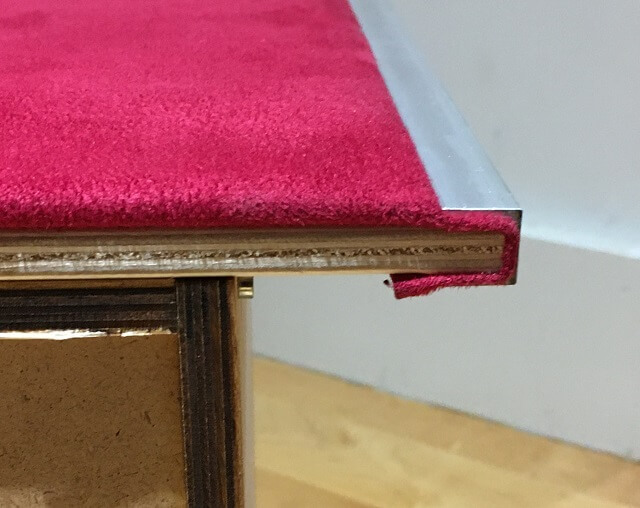
To avoid this problem, I use a second board, 10 mm birch plywood, which is a bit longer than the first one. I put this second board under the fabric-foam-board sandwich, wrap the short edges of the fabric around the second board, and then I use aluminum channels that I press on the edges to lock the remaining short fabric edges in place. The aluminum channels are dimensioned such that the inside space is slightly larger than the second board's thickness. This provides enough space for the fabric, but not too much so that these channels firmly compress and thus hold the fabric in place. For additional security one can put two screws from the bottom through the aluminum channels into the plywood, but it is not really necessary.

The nice thing about this configuration is that it avoids any bunching up of fabric, and it allows one to exchange the top fairly easily and reuse the second board and aluminum channels. I also like the look of the metal edges. It gives the close-up mat a distinct look that I haven't seen anywhere else.
To finish it off put rubber feet on the bottom of the plywood. There are kinds that you can screw or glue on. A self-adhesive-backed foam tape also works great. Cut off four pieces and glue them into the four corners or the entire length along the short edges. Even for somebody who is not really that much into making and building stuff, this is a fairly easy project. Your wife might already have the necessary foam and fabric. Have some fun with it. A close-up mat is something you will use all the time.
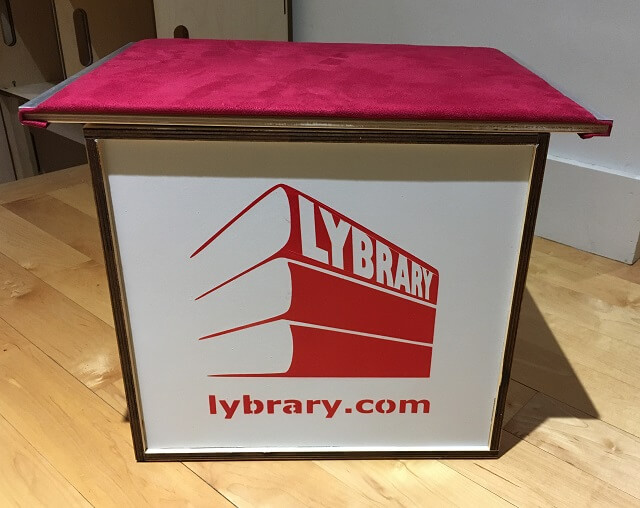
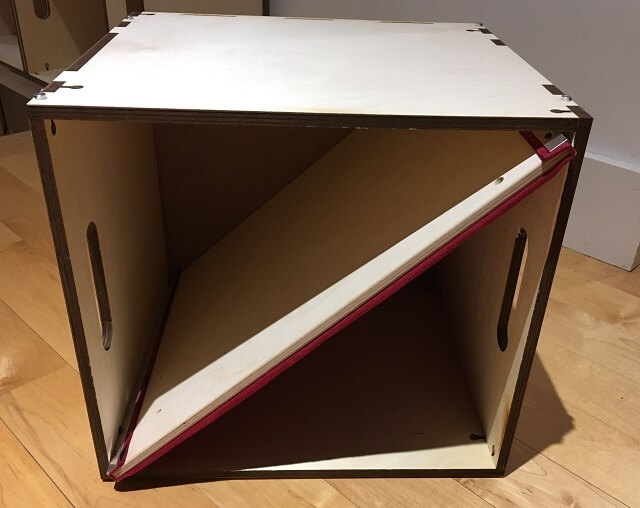
Here is a photo of the mat I have made. It goes together with a wooden box it sits on. The wooden box is a kind of desktop lectern to elevate the close-up mat to a height comfortable for performing and watching when standing. And that same box also stores the mat and other items for transportation. That way the close-up mat top surface is well protected during transportation.

